This post may contain affiliate links. Please read our disclosure policy.
This roast turkey recipe is tender, juicy, and simple to make with a delicious garlic herb butter rubbed on the skin. Perfect for Thanksgiving, Christmas, or a special occasion!
Is a turkey too big for your holiday gathering? Try my Easy Roast Chicken instead.
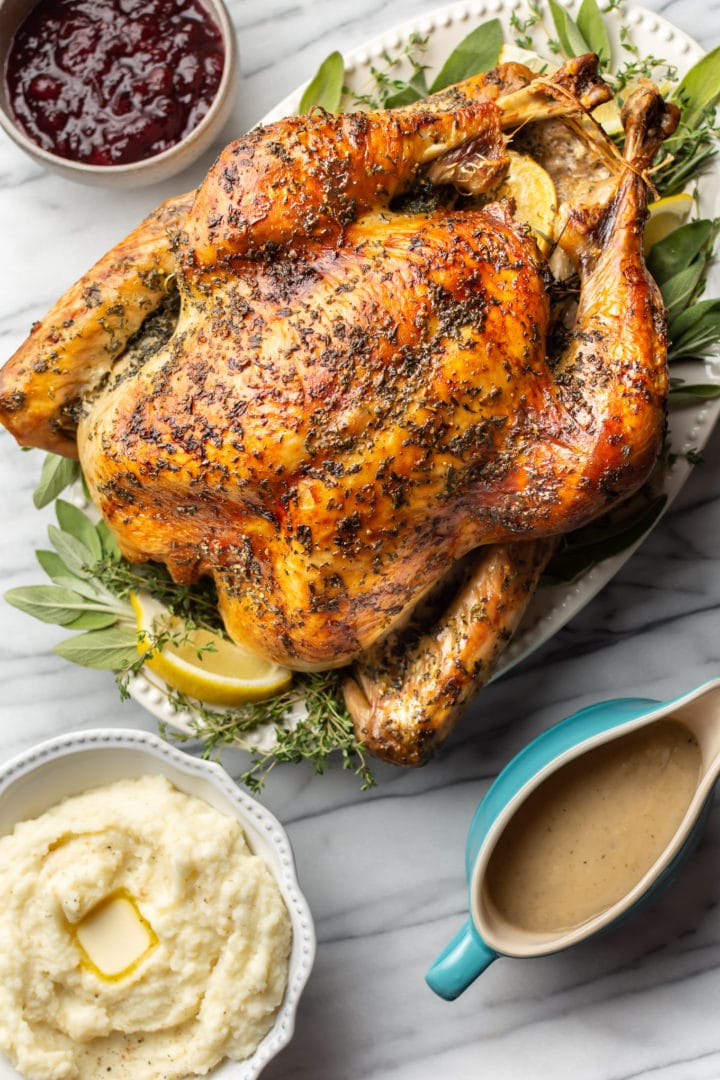
Best roast turkey recipe
So you’ve decided to roast a turkey. The good news is that learning how to roast a turkey does not have to be too intimidating or difficult. There are many different ways to cook it, but this method is simple and fairly hands off once you get it in the oven (no basting), and it will allow you to enjoy the day and even prepare some delicious sides like these Garlic Mashed Potatoes.
Read on, as this blog post is filled with tips to help you to roast a Thanksgiving turkey with confidence!
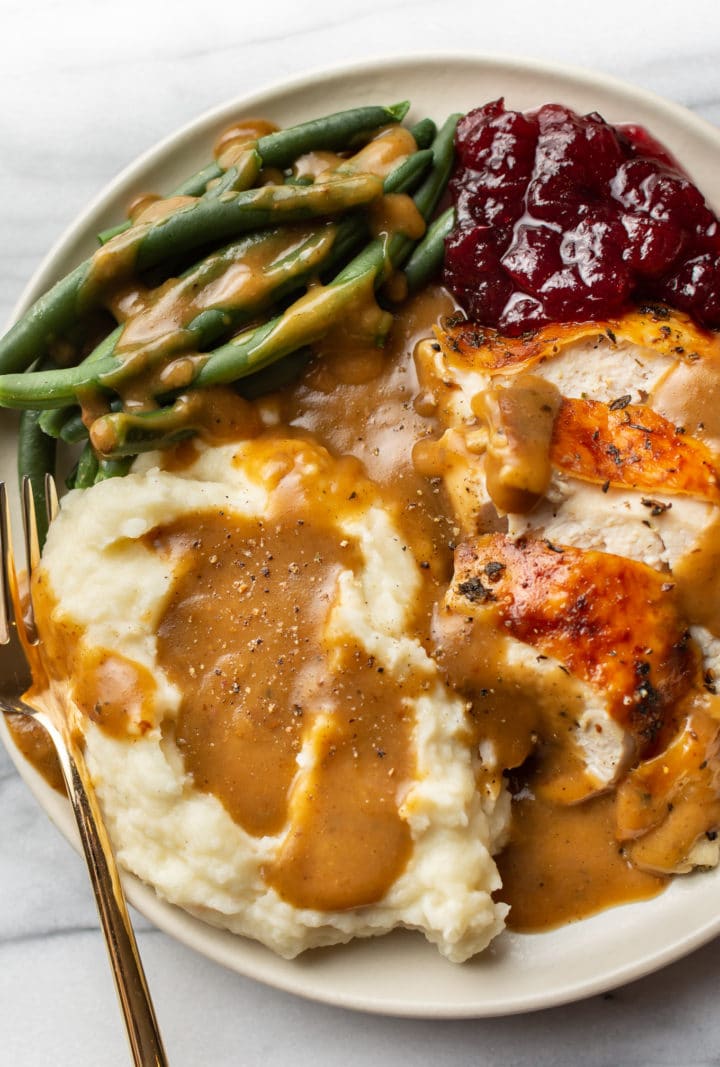
What size turkey to buy
Generally people will eat 1-2 pounds of turkey at Thanksgiving, but of course rules don’t always accurately reflect reality, so that’s why I like to make a bit extra. If you’ve got light eaters or a ton of sides, stick to 1-1.25 pounds per person. Want to ensure people can get their fill and you will still have some leftovers? Plan on buying an 8 pound turkey for 4 people, 12 pounds for 6 people, 16 pounds for 8 people, or 20 pounds for 10 people.
Thaw your turkey in advance!
- Plan on letting it thaw in its packaging in the fridge for 1 day per every 5 pounds. So, if you have a 15 pound turkey, it’ll take about 3 days to thaw. Do not leave it out on your counter all night the day before Thanksgiving for safety reasons.
To brine or not to brine?
This is optional. I don’t brine my turkey for this recipe. Wet brining can be messy and the skin doesn’t crisp up as easy. Dry brining is a bit less messy if you do want to go the brining route, however. I recommend letting the turkey sit uncovered in your fridge overnight if you do use a dry brine. If using this recipe with a brined turkey, I would reduce the salt or eliminate it altogether (even from the butter).
Everything is better with butter.
Rubbing softened butter all over the turkey skin keeps the meat moist and helps the skin crisp up. You can rub some of it under the skin, but there’s a chance it’ll rip if you’re not careful, so I generally just rub it over top.
How long to cook a turkey at 350F
The general rule is 13 minutes per pound for an unstuffed turkey. For my 14-pound bird, that means it took about 3 hours. Use an instant read meat thermometer, inserted into the thickest part of the thigh, to gauge if it’s cooked (minimum of 165F, but you won’t ruin it if it’s in the low 170s).
Make stuffing separately.
If you place stuffing in the cavity of the bird, it must reach 165F to be considered safe to eat. This means that the breast will likely become overcooked before the stuffing is done, so many people opt to cook the stuffing separately. Try my Sausage Stuffing as a delicious dish to serve alongside this turkey.
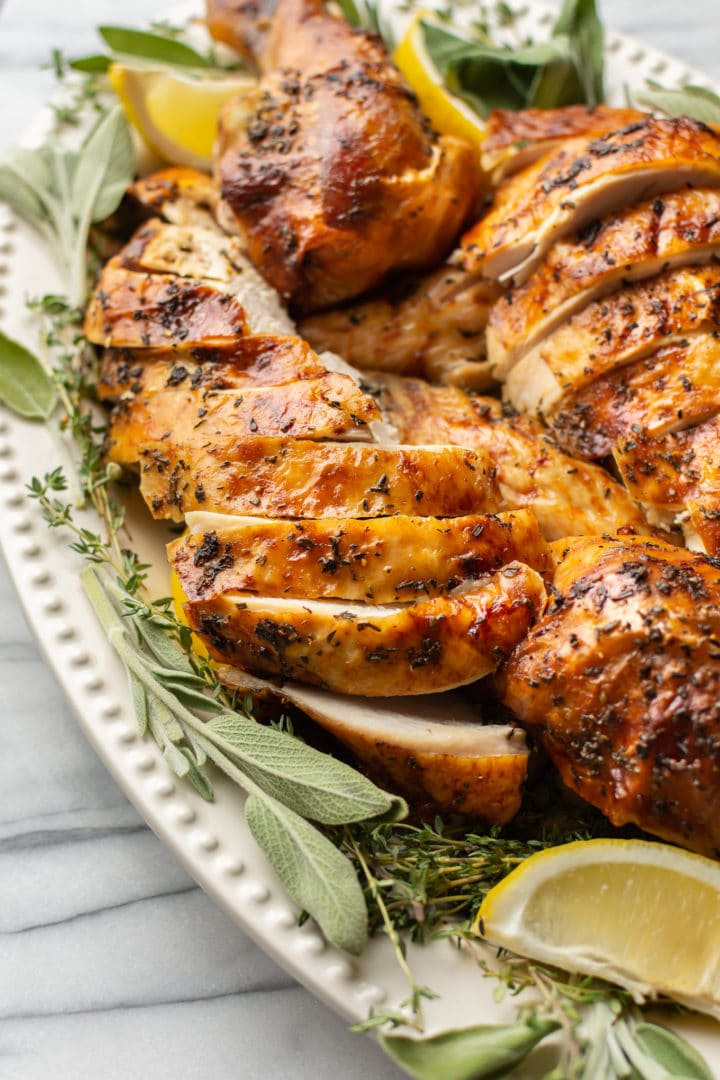
You’ve come this far… now let it rest!
Resting allows the turkey juices to redistribute. Cutting too early means the juices will seep out, and you’ll be left with tough meat. The temperature will also continue to rise a bit during this time by approximately 5-10 degrees F (it’ll cook a bit more after you take it out of the oven). I don’t cover/tent the turkey with foil during this time, but you can if you wish.
How to carve a turkey
- Carve it like you would a chicken. Try this step-by-step guide (plenty of photos), or check out this YouTube tutorial if you prefer to watch a video.
What about the gravy?
My Turkey Gravy recipe can be made ahead. Add some of the turkey drippings in while the bird rests. Be sure to use a fat skimmer to separate out the fat. Or you can make my Brown Gravy (No Drippings Needed) if you prefer.
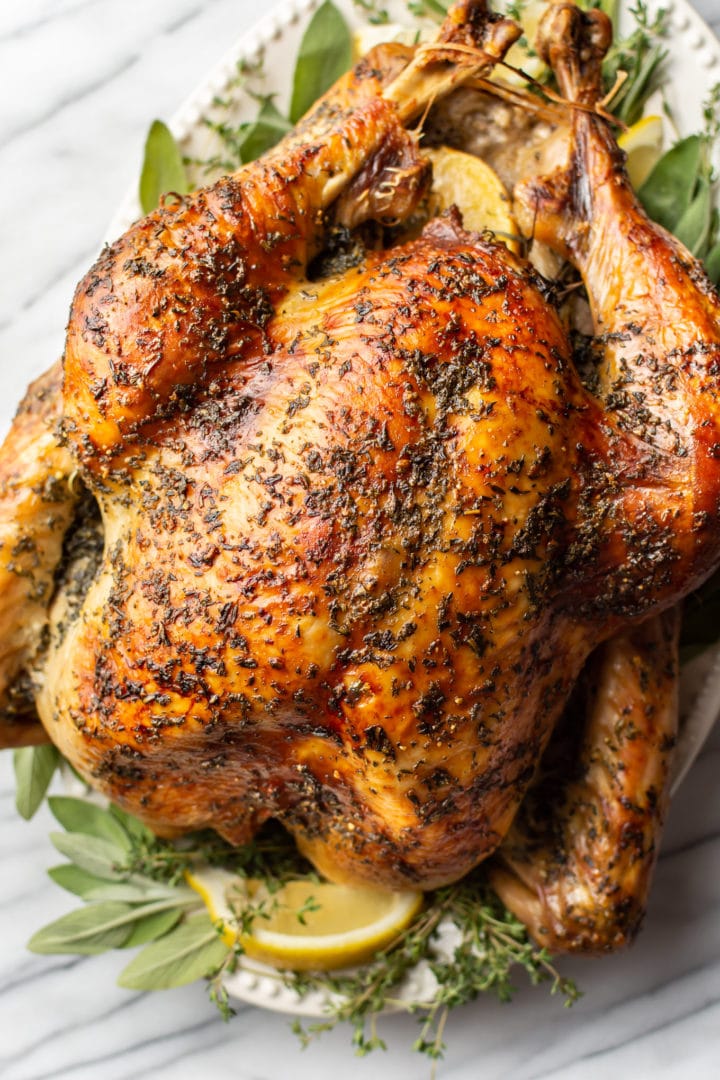
Recipe notes and tips for success
- You will want to elevate the turkey for best results. I use a roasting pan with a rack.
- I don’t add any extra liquid to the bottom of the roasting pan. Some recipes do this, but I find that it can make the bird steam and the skin doesn’t end up quite as crispy. It’s up to you if you do want to add some (add 2-4 cups of chicken broth/stock if doing this).
- You can make the butter rub with dried herbs if you prefer/can’t find fresh herbs. I’d use some Italian seasoning or a poultry blend and use less than suggested for the fresh herbs (approx. 1 teaspoon for every tablespoon).
- I recommend using sea salt or kosher salt on the turkey. Do not salt your turkey if it’s already been brined.
- I don’t wash the turkey. It doesn’t actually kill bacteria, but it does a great job of spreading bacteria around your kitchen.
- I recommend reading through the recipe a couple of times before you start cooking so you’re familiar with it and so you don’t accidentally forget to purchase any ingredients.
Leftovers and storage
- Be sure to refrigerate leftovers within 2 hours of taking the turkey out of the oven.
- Leftovers will last 3-4 days in the fridge, or freeze them for 2-3 months.
- Wondering what to make with leftover turkey? Try my popular Thai Turkey Soup, this Easy Leftover Turkey Soup, or this Leftover Turkey Chili.
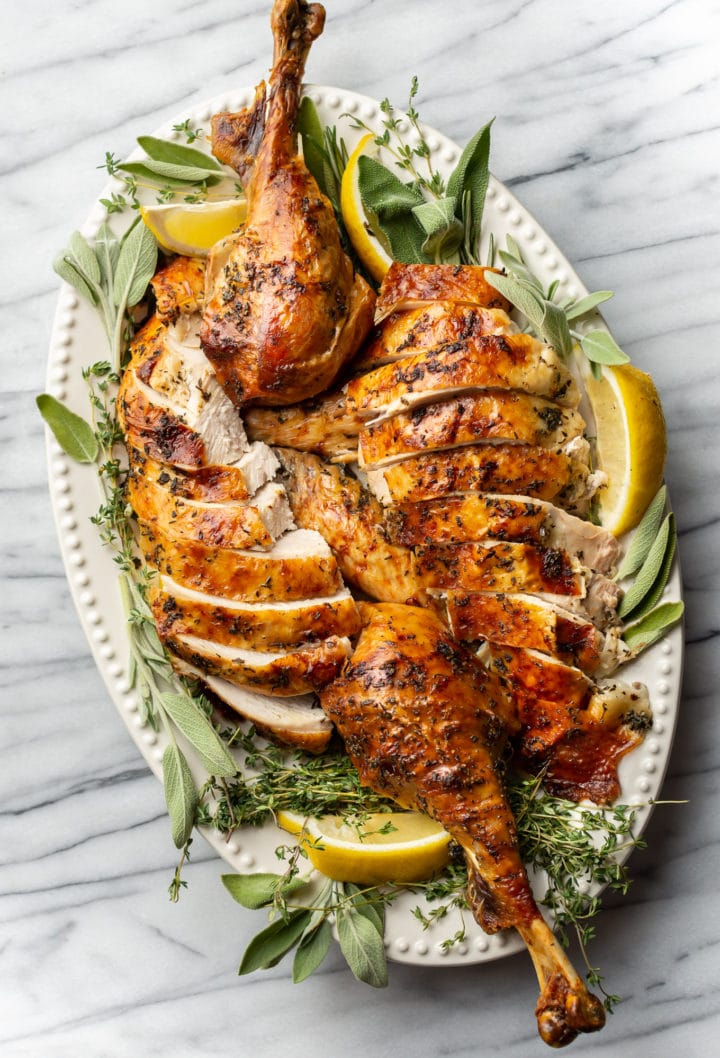
Hope you love this oven roasted turkey recipe! If you can’t find the answer to your question in the blog post, talk to me in the comments below.
Easy Roast Turkey
Ingredients
- 1 (14-16 pound) whole turkey see note
- Salt & pepper to taste
Herb butter:
- 1 cup unsalted butter (2 sticks) softened
- 1 tablespoon fresh sage chopped finely
- 1 tablespoon fresh thyme chopped finely
- 1 tablespoon fresh rosemary chopped finely
- 4 cloves garlic minced
- 1 teaspoon salt
- 1/2 teaspoon pepper or to taste
Inside the turkey:
- 1 lemon halved
- A few sprigs each fresh sage, thyme, and rosemary
- 1 head garlic break into cloves and peel them
Instructions
- Take the turkey out of the fridge to let it warm up for an hour prior to roasting it. Set it on a baking sheet (this will help collect spills etc. once you open the packaging later on). Also take the butter out of the fridge to let it soften up.
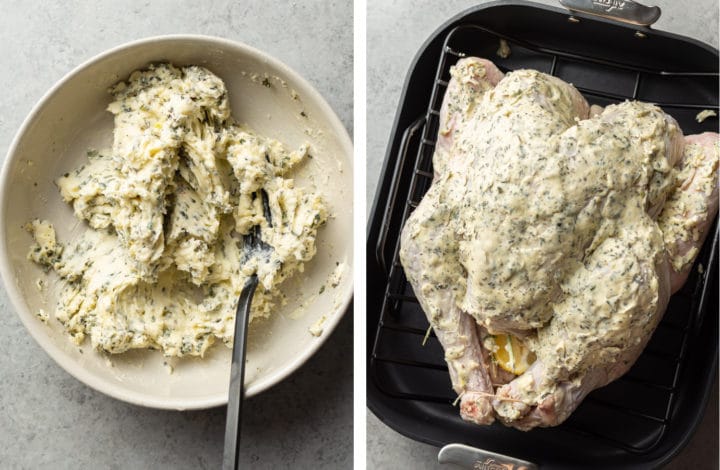
- Add the butter to a bowl, along with the other herb butter ingredients. Mash together with a fork.
- Preheat oven to 450F and move a rack to the bottom third of the oven (remove the rest of the racks so there's plenty of room).
- Take the turkey out of its packaging and remove the giblets and neck if they were included (found inside the cavity). If your turkey was frozen, you'll want to do this near the sink since there will be lots of excess liquid. Be sure to drain as much liquid from the cavity as possible, then put it back on the baking sheet.
- To prep the turkey: Pat it dry with paper towel. Season with salt & pepper (add some inside the cavity too… about a teaspoon of salt in total since the herb butter contains salt too). Stuff the cavity with the lemon, herbs, and garlic. Rub the turkey all over with the herb butter (I don't do the very bottom of the bird). Tuck the wings under the turkey and tie the legs together with kitchen twine (optional, but it makes for a neater appearance).
- Place the turkey on the rack of the roasting pan (breast side up).
- Place the roasting pan in the oven and reduce the heat to 350F.
- Roast the turkey for about 3 hours (for a 14 pound turkey), until an instant read meat thermometer inserted into the thickest part of the thigh reads 165F. When the turkey rests, the temperature will continue to rise, and the thigh meat should end up in the 170s, which will be perfectly tender. Begin testing for doneness 30 minutes before total roasting time is reached to avoid surprises. There is no basting in this recipe. Important: the skin will brown before the turkey is done (up to an hour or so before). At this point, loosely cover the turkey with non-stick foil for the remainder of cooking time so the breast meat doesn't burn.The timing rule for turkey is 13 minutes per pound at 350F, so adjust accordingly based on the size of your bird. Also remember that each time you open the oven, it'll lose some heat and cooking time will increase a bit.
- Once the turkey is cooked and out of the oven, carefully tilt the roasting rack so the juices inside the turkey spill out to the bottom of the pan (these can be made into gravy!). Lift the rack (with the turkey on it) and transfer the turkey to a large cutting board or plate. Let it rest for 20 minutes prior to carving. This is important! The juices need time to redistribute or else you'll end up with a dry turkey. You can use the drippings to make gravy while the turkey rests.
Notes
- You can roast a turkey that doesn’t fall within the 14-16 pound range, but if it’s much bigger or much smaller, you may want to use a bit less/more butter and fillings in the cavity. The timing rule is to roast 13 minutes/pound at 350F. I would not roast a turkey without having an instant read thermometer.
- Use sea salt or kosher salt if possible. Do not salt an already brined turkey, and I would reduce or eliminate the salt in the butter if using this recipe with a brined turkey.
- Please see blog post for more tips and answers to FAQs!
Nutrition
Nutrition information is automatically calculated, so should only be used as an approximation.
© Salt & Lavender Inc. Content and photographs are copyrighted. Sharing this blog post is much appreciated, but copying and pasting full recipes without authorization to social media is strictly prohibited.



My family loved it! my little sister said turkey is made to be dry but with this recipe I decently changed her mind!
I love the fact that the author gave leftover recipes to go with this one and tonight were trying the leftover turkey chili, so excited!!
That’s awesome!! 😀 Thanks, Ryan!
Thank so much for your tasty recipes! Tried this one a few weeks back and it tasted great but the legs on the turkey were overdone (all the other turkey parts were perfect. ) I’m wondering if it’s because we use propane for our oven, it might run a little hotter. Just curious, what type of heat do you use? Is it convection or electric? Need to determine how to adjust our temperature for the next time we try making a turkey…
Hi Michelle! You’re very welcome. You may want to cover the legs with foil a bit earlier. My oven is a regular electric one – not convection.
Do you think I can prep the turkey, as you’ve mentioned, the night before and then just pop it in the oven day of?
That should be ok!
I made this for Thanksgiving and my family said it was the best oven turkey I’ve ever made. I followed the recipe as stated except for using dried herbs, not fresh. We also purchased a fried turkey. My family liked my turkey over the restaurant one too!
That’s awesome!! Thank you!
Best, most delicious turkey I’ve ever made! I’ve tried many recipes over the years and while I love the nostalgia of making a turkey at Thanksgiving I’ve never actually liked the taste unless it’s smoked. I’ve brined and basted and gone back and forth but this year (knowing that I love sooo many Salt and Lavender recipes) decided to give this one a try and we LOVED it! Best Turkey ever! Even my parents commented how it was the best they’ve ever had! I will def be saving this recipe!!!
Yay!! That’s so nice to hear! 😀
I cooked it like you said. Gathering at family dinner. Lots of rosemary and lemons from my garden. Not too much butter on outside. Perfect.
Today I’ll cook another one for my daughter.
Wonderful! Thanks, Charlene!
I used this recipe for Thanksgiving 2024 and it was a huge hit. Will use again for sure!
Wonderful to hear, Belinda!
My turkey came out perfectly using this recipe! It looked just like the picture! That herb butter infused into the turkey and it was full of flavor! This will always be my go-to recipe from now on!
I’m thrilled to hear that, Christina!! 😀 Thanks for your review!
Used this recipe for my turkey this year, only change I made was I still basted every 45 minutes, it was the BEST turkey I’ve ever had! I have been cooking Thanksgiving for family for 27 years every single person said it’s the best they’ve ever had!!! Even my husband who doesn’t really like Turkey!!!!
I’m thrilled it was a hit, Kim!! 😀