This post may contain affiliate links. Please read our disclosure policy.
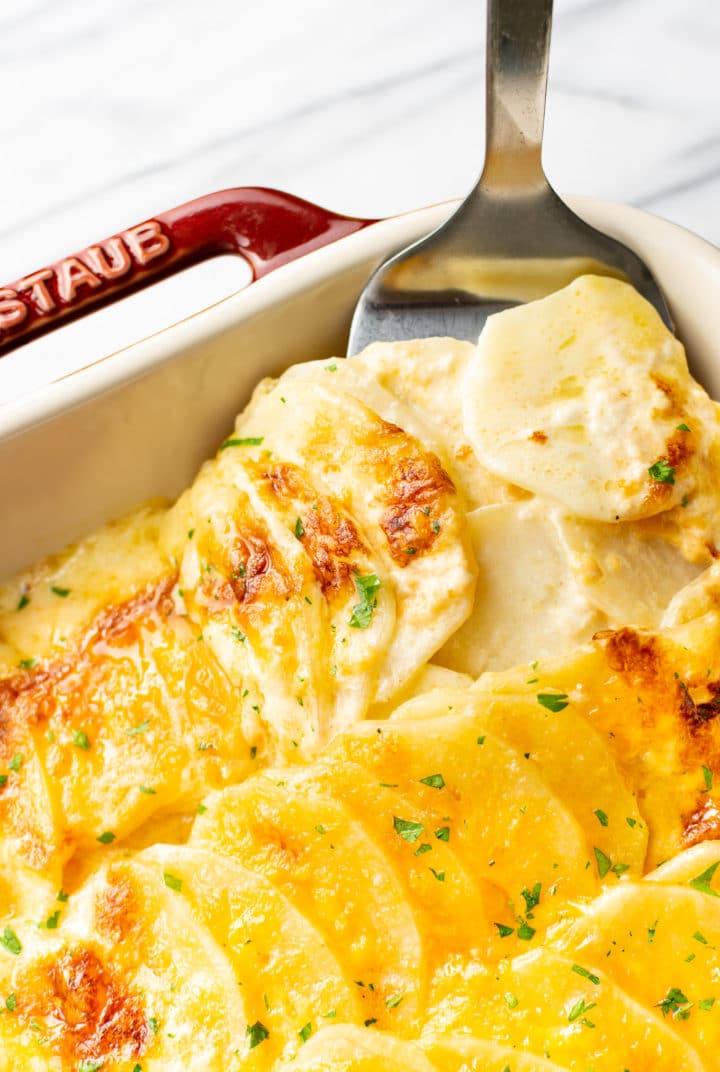
This easy scalloped potatoes recipe is incredibly comforting, creamy, cheesy, and rich! It’s a simple side dish that feeds a crowd and has very few ingredients.
You may also like my Funeral Potatoes or this Cheesy Potato Casserole.
Why you’ll love them
Scalloped potatoes are the best holiday side dish, but they’re a great weeknight side dish as well. It’s thinly sliced potatoes that are cooked in a garlicky cream mixture, which thickens in the oven for irresistible layers of potato and cheese heaven.
Layering the slices might seem tricky, but this step-by-step guide will show you just how hassle free yet impressive this side dish is to assemble. You’ll even have time left over to make these Deviled Eggs too for your next feast or gathering!
Is this potatoes au gratin?
- Sort of! If you want to get a little technical, this dish borrows a technique from au gratin potatoes. There’s cheese not only on top but also in between each potato layer, which just adds to the deliciousness. Lots of sources use the terms interchangeably, but mine is kind of a hybrid of au gratin and scalloped potatoes. Whatever you call it, it’s delicious.
What you’ll need
- Potatoes – use either Russet or Yukon gold. Either will work.
- Butter – for the base of the cream sauce
- Garlic – if you’re a garlic lover, go ahead and add more
- Heavy cream – for ultimate creaminess. I wouldn’t recommend using anything else
- Cheese – we’re using both cheddar and parmesan for extra cheesiness!
Tools for this recipe
Check out Natasha’s favorite kitchen essentials, gadgets, and cookware!
- I highly recommend using a mandoline slicer to get even slices fast. It takes me less than 5 minutes to cut the entire 3 pounds of potatoes up. I also always use a protective glove so it’s a worry-free experience.
- Definitely grate your own cheeses. They will taste and melt a lot better, so it’s worth the bit of extra effort. I use this grater for the cheddar and this grater for the parmesan.
- Here is the 9×13 baking dish pictured.
How to make scalloped potatoes
This is an overview with step-by-step photos. Full ingredients & instructions are in the recipe card below.
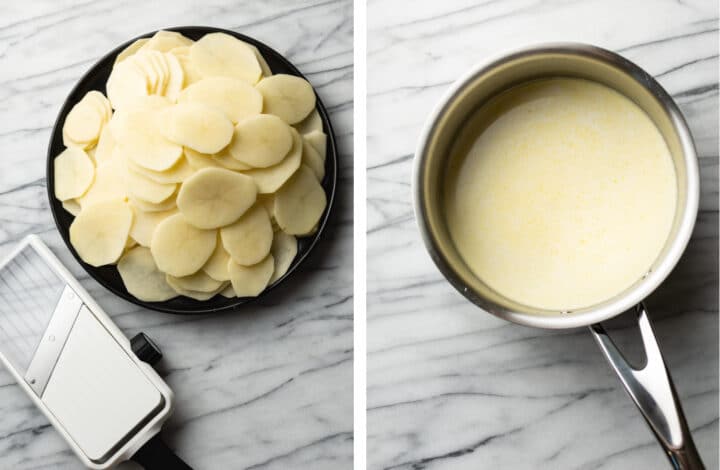
Preheat the oven. Grate the cheese, and slice the potatoes with a mandoline. In a small saucepan, add the butter and garlic. Fry until fragrant, then stir in the cream and salt & pepper. Let it warm, and remove from the heat.
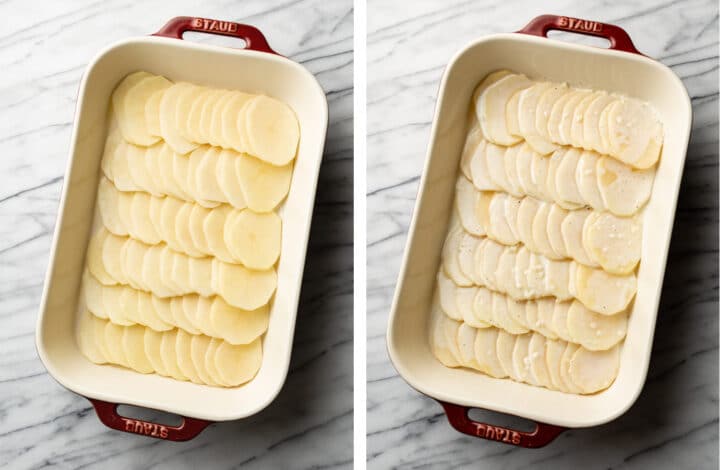
Arrange half of the potato slices to the bottom of a baking dish. It’s ok if you don’t do this perfectly evenly! Pour half the cream mixture over top.
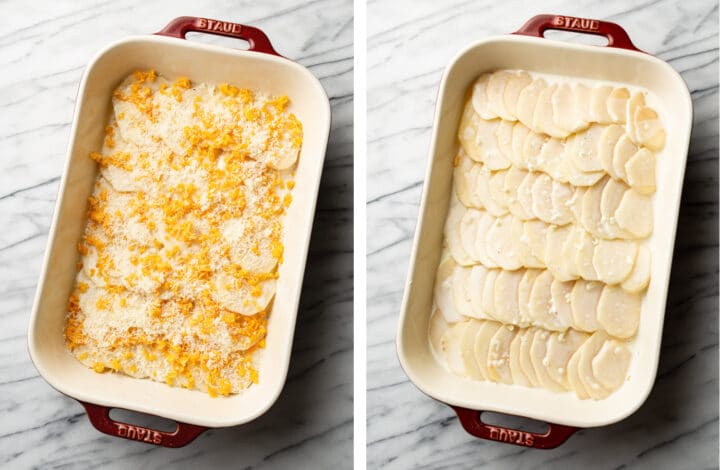
Sprinkle on half the cheddar and parmesan cheese. Arrange remaining potato slices over top of the first cheese layer. Pour in the other half of the cream mixture.
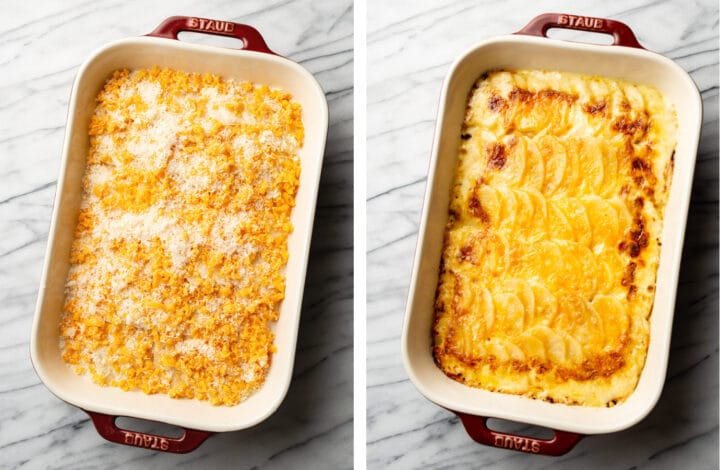
Top with the rest of the cheese, and bake until golden.
Make ahead tip
- Assemble the potatoes up until the step prior to baking. Cover them tightly with foil, and refrigerate up to a day ahead.
- It may take a bit longer to cook them than suggested since they’ll be cold coming straight from the fridge. I’d let them warm up on the counter for an hour or so prior to baking!
Substitutions and variations
- I don’t recommend subbing the cream for something lower fat. It may curdle/separate and it won’t thicken the same since there’s no roux in this recipe.
- You could change the cheeses up if you wish. For example, any nicely melting cheese like Gruyère will work instead of cheddar for a twist.
- You’re welcome to throw in some herbs if you like such as rosemary or thyme!
What to serve with scalloped potatoes
- They go with any main course. Try my Crispy Air Fryer Chicken Thighs and Garlic Butter Steak Bites.
- If you’re making these for Christmas or Easter or Thanksgiving, try pairing with this Easy Roast Turkey, my Easy Roast Chicken (Lemon & Herb), or baked ham.
- For more crowd-pleasing side dishes, serve along with this Jiffy Corn Casserole, Baked Mac and Cheese, or my Green Bean Casserole.
Leftovers and storage
- They will keep for 3-5 days in the fridge in a covered container.
- Reheat these potatoes in a covered saucepan on the stove at a low heat vs. in the microwave unless you put it on a lower setting. The cream is likely to separate if you warm the potatoes up at too high of a heat. You could also warm them up in the oven if you’ve got a lot left still in the casserole dish. Cover with foil.
- I wouldn’t recommend freezing leftovers because of the cheese and cream.
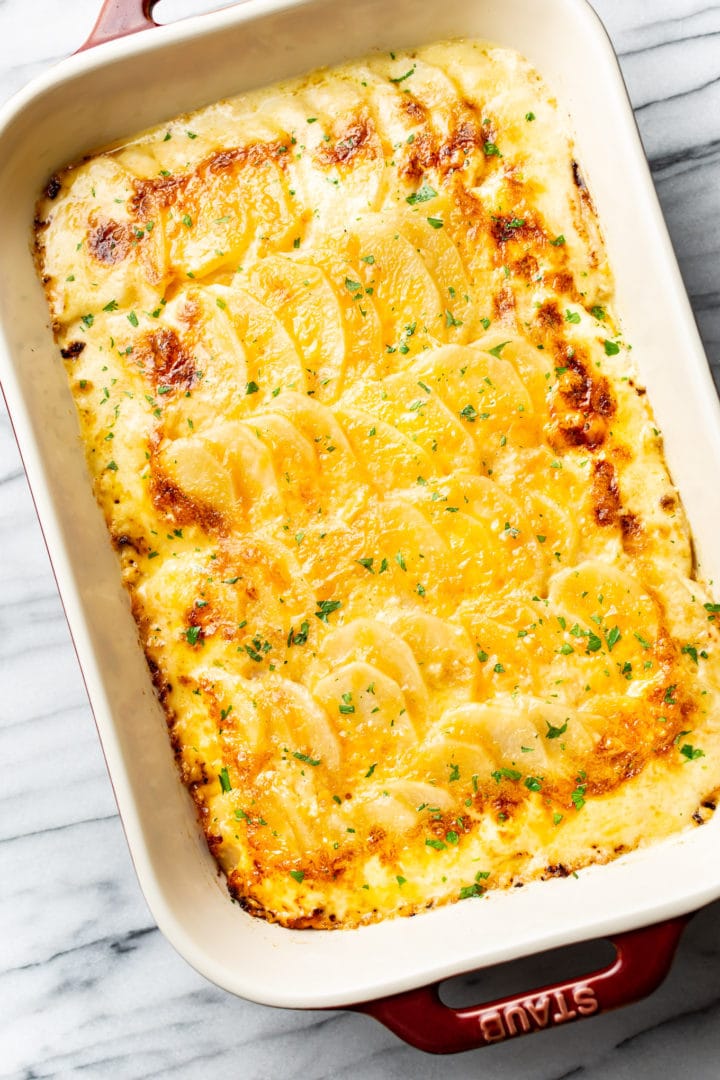
If you made these cheesy scalloped potatoes, please leave a star rating and review below! I love hearing from readers. I’m also on Instagram.

Easy Cheesy Scalloped Potatoes
Ingredients
- 2 cups freshly grated cheddar cheese
- 1 cup freshly grated parmesan cheese
- 3 pounds Russet or Yukon Gold potatoes
- 1 tablespoon butter
- 3 cloves garlic minced
- 2 cups heavy/whipping cream
- 1 teaspoon salt
- Pepper to taste
Instructions
- Preheat your oven to 350F and move the rack to the middle position.
- Meanwhile, grate the cheeses and prepare the potatoes by peeling them and using a mandoline slicer to cut them into 1/8" (3 mm) slices.
- Add the butter to a small saucepan over medium-high heat, and once it's melted, add the garlic and cook it for about 30 seconds. Add in the cream, salt, and some pepper. Let it warm through, stirring occasionally. As it reaches a boil, take it off the heat.
- Arrange half of the potatoes on the bottom of a greased 9×13 baking dish (overlap the potatoes but don't worry about arranging them perfectly). Pour half the cream mixture over top, and then add half of each cheese. Repeat the process for the second layer, finishing up with a layer of cheese on top.
- Bake, covered with foil, for 40 minutes, then remove the foil and bake for another 25-35 minutes or until a toothpick slides into the potatoes without much resistance. Ovens vary, so check for doneness earlier than suggested if your oven runs hot.
- Let the potatoes sit for 5-10 minutes prior to serving.
Notes
- Serves anywhere from 6-10 depending on serving size/what else you serve these with.
- I highly recommend using a mandoline slicer to cut the potatoes into uniform slices quickly and without hassle. I always use a protective glove with my mandoline.
- You may want to place the baking dish on a baking sheet just so any splatter/spills don’t end up in your oven (especially if your baking dish is a bit shallow).
- See blog post for more tips including how to make these ahead and step-by-step photos that show how to layer them.
- This recipe is also in chapter 8 of the Salt & Lavender: Everyday Essentials cookbook.
Nutrition
Nutrition information is automatically calculated, so should only be used as an approximation.
© Salt & Lavender Inc. Content and photographs are copyrighted. Sharing this blog post is much appreciated, but copying and pasting full recipes without authorization to social media is strictly prohibited.



The potatoes need to be boiled before adding to the recipe.. Potatoes were super hard after the completing the recipe instructions. Had to cook my scalloped proses for just about three hours to soften.
Hi! It was thoroughly tested in my kitchen, and it has worked out for most readers as you can see from the reviews. Did you slice the potatoes as thinly as suggested in the blog post? I don’t see how it could have taken 3 hours to cook unless your potatoes were very thickly sliced or something is wrong with your oven.
This is the best‼️💯
Thank you!! 😀
A family favorite!
Thank you, Brooklyn!
Can I pre-boil the potatoes and then cut them and cook for a less time?
Hi! I suppose, but you won’t get the nice thin slices if you’re doing it with a knife (not sure if that was your plan or not). I’m not really sure it’ll turn out as it’s supposed to if you pre-boil them… they might absorb the sauce differently than intended as well.
Really good! I have made it numerous times and turns out delicious every time.
I’m thrilled to hear that, Kaelee!! 😀 Appreciate your review!
AMAZING!!
My family loved this recipe definitely putting this in my book. Thank you for sharing.!
Thanks so much, Heather! Glad you enjoyed it. This recipe is actually in our cookbook if you’re interested! 🙂
Getting ready to make this for dinner this week. Once you slice your potatoes, do you soak them in water to clear the starch from them?
Hi Sam! I don’t, but you’re welcome to if that’s something you normally do when making scalloped potatoes. Hope you enjoy the recipe!
Just made this recipe for my family tonight served alongside a baked chicken and OMG everyone went back for seconds and thirds!! This is the most delicious and EASY recipe! Will be making this again for the holidays for sure.
That’s wonderful!! 😀 Thanks so much for letting me know, Katie!
Nice recipe!! I used more cheese but my family LOVES cheese 🧀 it was delicious I’ll be making this again!!
Fantastic!! 😀
Outstanding recipe. Made on Friday and kept in fridge till Sunday when I baked. Everyone loved!!
That’s amazing!! 😀 Thanks so much for your review!
You answered my question! I want to make this ahead of time and bake later. Thank you!
We have a “make ahead” section in the blog post with tips/instructions. 🙂